-
 jp
en
jp
en
GrapeSEED Connect Class Setup
How to Gain Access to GrapeSEED Connect
To gain access to GrapeSEED Connect, you will need to contact your local GrapeSEED representative and request access.
How to setup a GrapeSEED Connect Class
Setting up GrapeSEED Connect classes involves some preparation:
- Grant Connect Access to Classes
- How to Add Connect Class Times to Your Class
- What is Connect Group
- How to Assign students to Connect Groups
- Don't Forget to Assign the Teacher to the Class
Grant Connect Access to Classes
To use Connect, the first step is for the school admin to grant Connect access to the classes. Here are the steps:
Go to the class.
Click on the "Manage Class" tab and go to "Edit.”
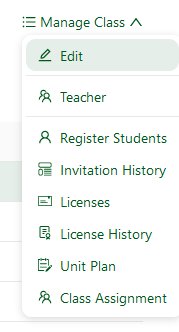
- In the "License Type" field, select either "Connect" or "Classic/Connect Hybrid.”

- Click "Save."
Now, the teachers assigned to this class will be able to see it from their GrapeSEED Connect web platform.
How to Add Connect Class Times to Your Class
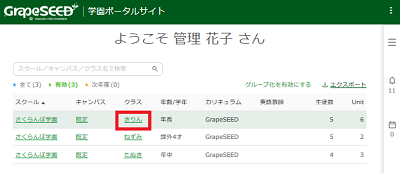
- Sign in to the GrapeSEED School Portal. On the Welcome page, click the link for the Connect class to open the class page.
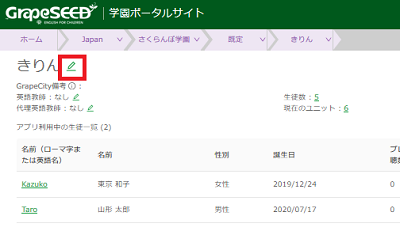
- Click the
 icon next to the class name on the left side of the class page.
The Edit Class page will appear.
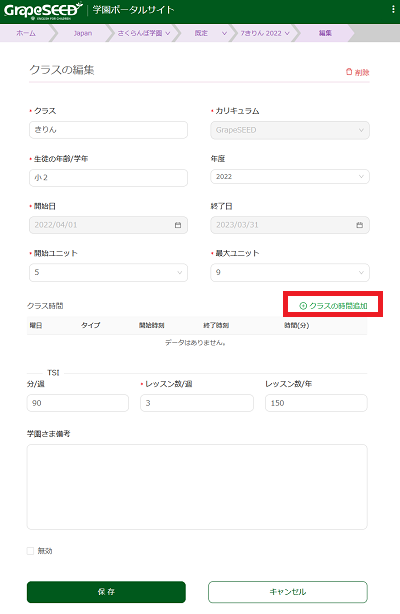
- Scroll to the latter section of the page and click Add class time.
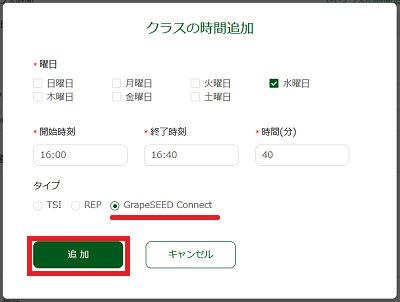
Please set the following items according to your class schedule.
- Days of the week
- Start and end times
- Select "GrapeSEED Connect" as the type
- Add multiple entries if lesson times differ by day of the week
After confirming the settings, click "Add".
- If everything is correct, click the Save button to save the changes.
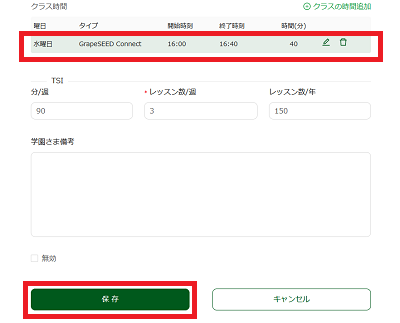
If your class has more than 12 students, you will need multiple class times, one for each student group you set up.
What is Connect Group
In order to start a GrapeSEED Connect class session, the class must have groups to assign to specific class times. In addition, GrapeSEED Connect only allows a maximum of 12 students in a session, so if your class is larger than 12 students, you need a way to split them up between different sessions.
To accomplish this, the Manage Groups feature has been created, allowing you to create groups, assign class times to groups, and place students in these groups. If groups have already been assigned, you will be able to see the “Group” column which tells you which group each student is in.
How to Assign students to Connect Groups
Sign in to the portal system. On the Welcome page, click the link for the class you are teaching with Connect.
From the Manage Class dropdown, select "Manage Groups".

- On the Manage Groups page, click Add Group.

Select a class time for that group by clicking on the Time Slot dropdown for the group you created.
- Finally, in the student list below the class groups grid, click on a group number for each student in the list to assign them to that group.
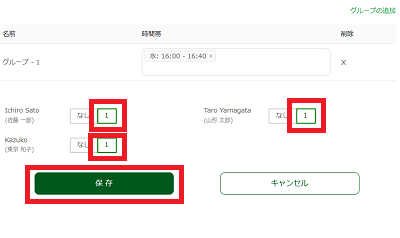
When everything is set up as you need, click Save.
While class groups can be created without a class time, you will not be able to start a GS Connect session. It is best practice to ensure that at least one class time is assigned to every group.
Don't Forget to Assign the Teacher to the Class
Please make sure that the teacher has finished the Connect training.
Assign the teacher to the class. The steps are described on the page below: