How to Manage Your Class
As a GrapeSEED teacher, you may manage your class via the GrapeSEED School Portal. The Class section of the School Portal allows you to perform specific administrative actions, like viewing and managing campus and class information.
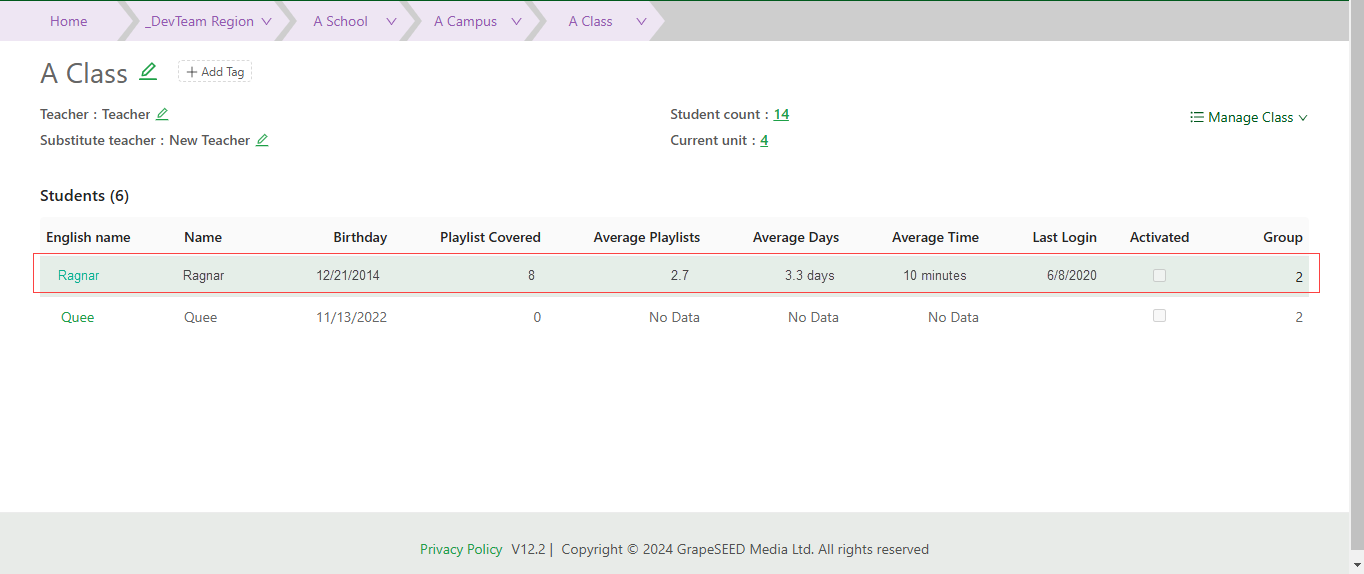
The default 'Class Form' provides you the following information about the class:
- Class Name
- Teacher
- Substitute teacher
- Student count/License count
- Current Unit
- List of Students
- Manage Class
For each student you can view Student app usage details as:
- Playlist Covered - The number of playlists completed for the current unit of the class.
Currently, it reflects the last 6 months of activity.
- Average Playlist - This is the average playlists per week based on the “Playlists Covered” calculation. Total playlists / (days since app unlock for current unit / 7).
- Average Days - Total Days with any session / (days since app unlock for current unit / 7).
- Average Time - This is the average total session length per day logged in for the student in the current unit (5 logins in one day totaling 1 minute each are considered 5 minutes for that day when calculating the daily average). Sum of all sessions' duration since current unit app unlock / (total number of Days with any session since app unlock).
Example: Assume student Ragnar has used the app a total of 100 minutes, with 10 days having logins, a total of 8 playlists, and the current unit app unlock date was 21 days ago. So, the values will be displayed as:
- Playlist Covered - 8
- Average Playlist - 2.7 [=8/(21/7)]
- Average Days - 3.3 days [=10/(21/7)]
- Average Time - 10 minutes [=100/10]
How to View Class Details
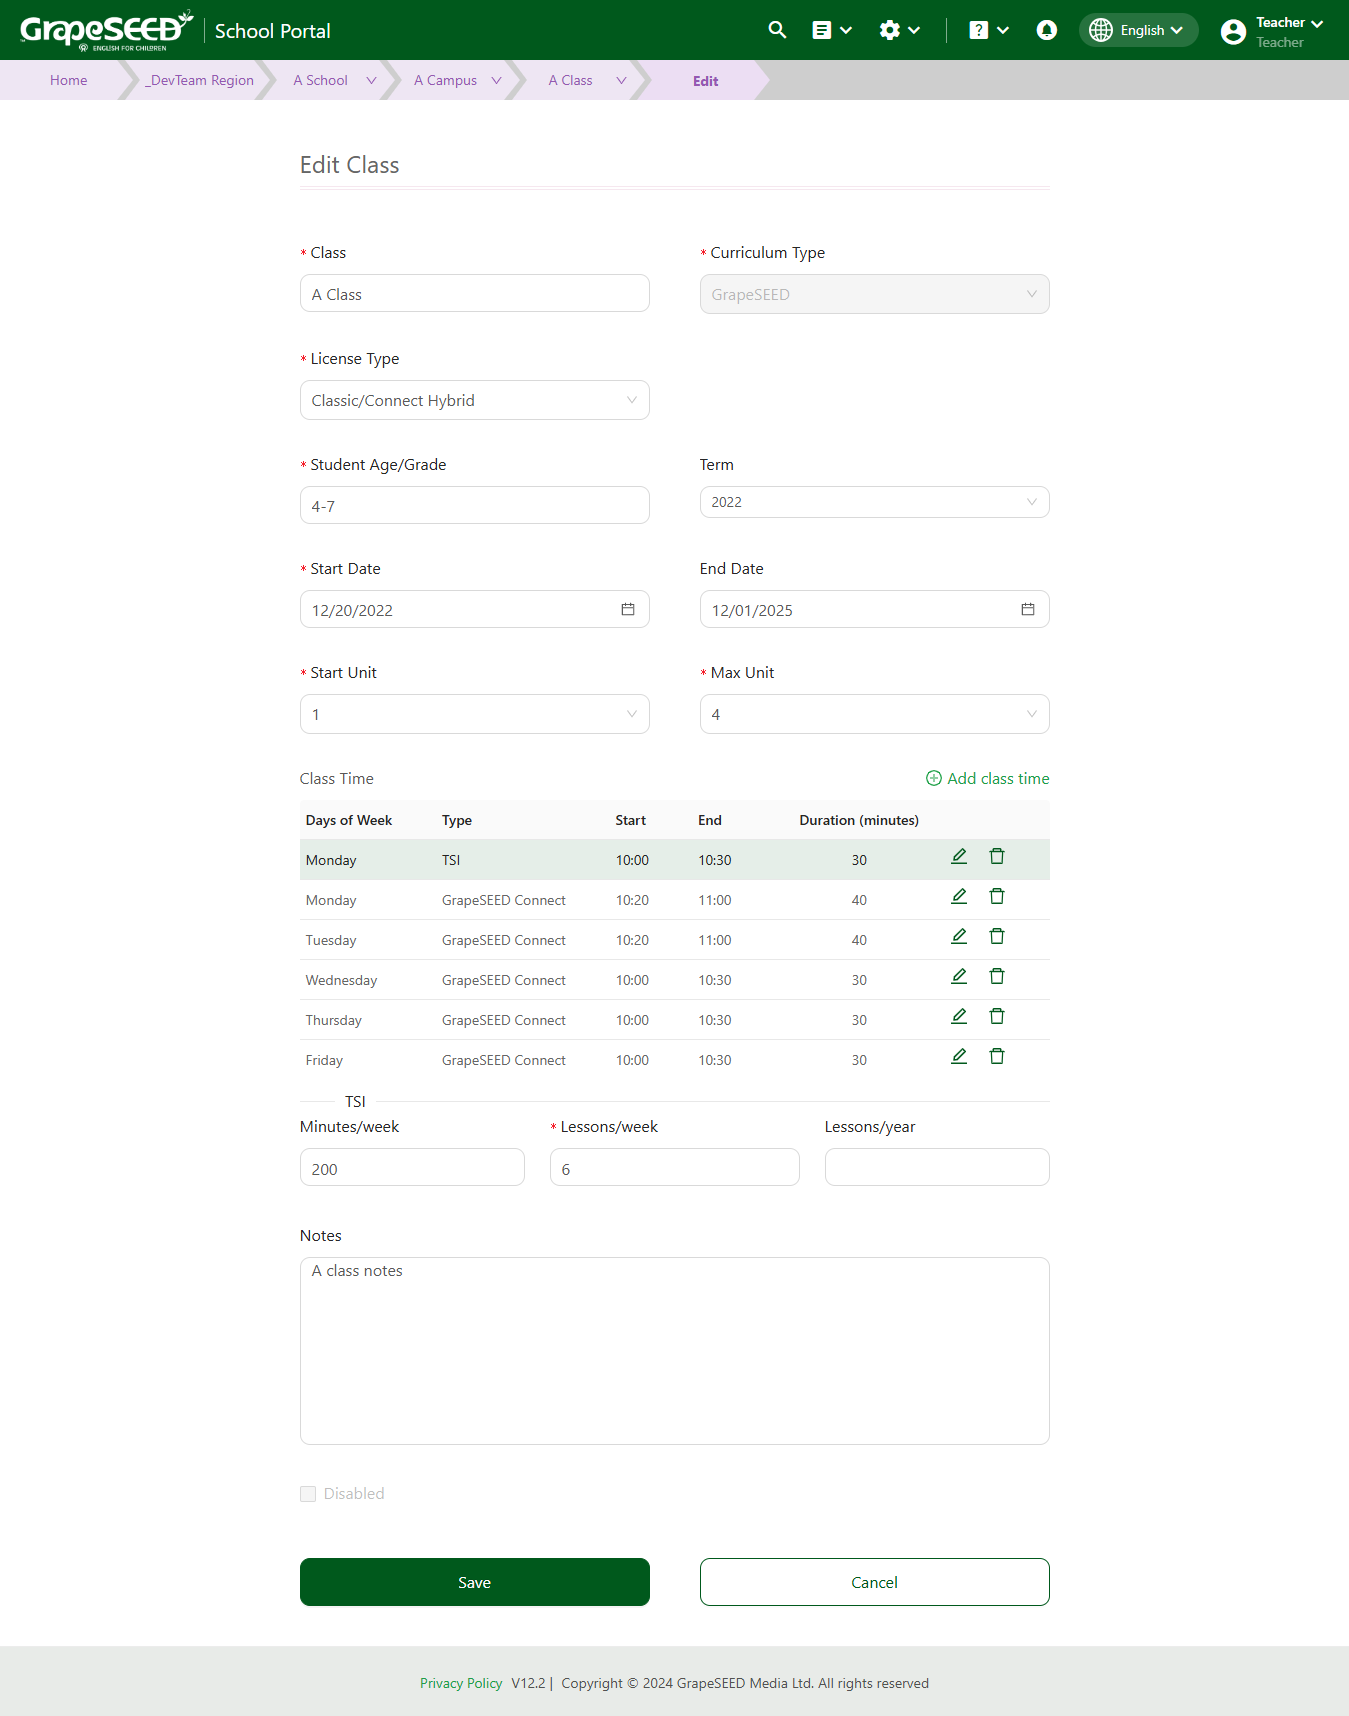
To view your class' details, click the ![]() button next to the class name to open the 'Edit Class' form. From there, you may view and edit the following information:
button next to the class name to open the 'Edit Class' form. From there, you may view and edit the following information:
- Class Name
- Class License Type (GrapeSEED/LittleSEED)
- Student Age/Grade
- Lessons Per Week
- Lessons Per Year
- Class Time
- The list of class time(s) when the GrapeSEED/LittleSEED programs will be taught in the class.
- TSI Time
- Minutes/week
- Lessons/week
- Lessons/year
- Start Unit - This field can only be edited by System Administrators, Region Administrators, or Account Managers.
- Max Unit - This field can only be edited by System Administrators, Region Administrators, or Account Managers.
- Class Start Date
- Class End Date
- Disabled/Enabled Status
If you make any changes, click the Save button to update your class data.
If you want to delete a class, open the 'Edit Class' form and click the ![]() Delete icon.
Delete icon.
You cannot delete a class that has historical data or is linked with other records. These classes can be disabled.
How to Add a Class Time
To add a new class time, open the 'Edit Class' form and click on Add class time below 'Max Unit'. This will open the 'Add Class Time' popup. Enter the following information:
- 'Days of Week' (required): Select one or more days of the week for the class.
- 'Start': Select a starting time for the class using the drop-down list.
- 'End': Select an end time for the class using the drop-down list.
- 'Duration (minutes)' (required): Enter a number of minutes for the class duration, or use the up/down arrows to increase or decrease the number.
- Type: Select a type for the class:
- TSI - Teacher-Student Interaction (in class)
- REP - Repeated Exposure and Practice (done in class)
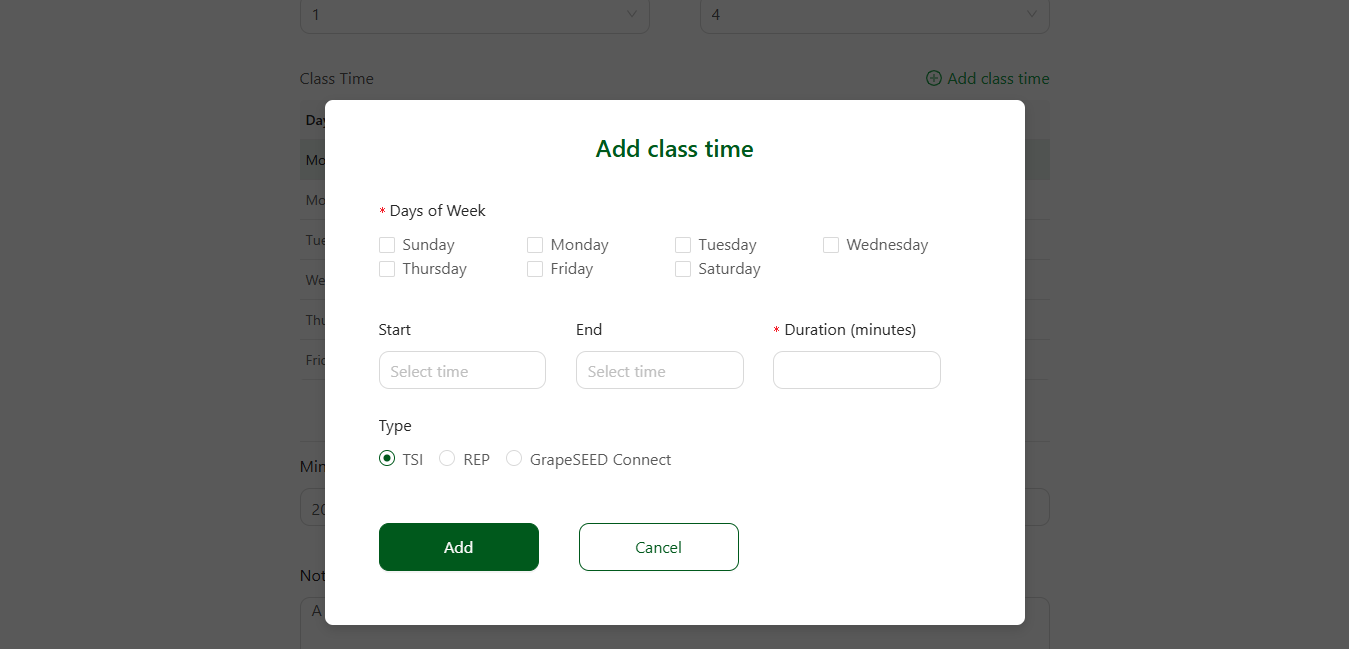
Once you've made your changes, click Add to save your new class time. Click Cancel to exit.
Your new class times will be populated in a table below Class Time on the 'Edit Class page.
We recommend that you create separate class times if your class times vary by day, or if your classes vary by Type. For example, you may have 30 minute classes on Monday but 45 minute classes on Wednesday. Or, you may perform TSI on Tuesday and REP on Thursday. These should have separate class times.
How to Edit a Class time
If you would like to edit a class time you created, click on the ![]() icon on the far right side of the Class Time table for the class time you would like to edit. This will open the Edit Class Time form in a popup.
icon on the far right side of the Class Time table for the class time you would like to edit. This will open the Edit Class Time form in a popup.
In the popup you may now make changes to:
- 'Days of Week': Select one or more new days of the week for the class.
- 'Start': Select your new starting time for the class using the drop-down list.
- 'End': Select your new end time for the class using the drop-down list.
- 'Duration (minutes)': Enter a new number of minutes for the class duration, or use the up/down arrows to increase or decrease the number.
- Type: Select a new type for the class:
- TSI - Teacher-Student Interaction (in class)
- REP - Repeated Exposure and Practice (done ine class)
Once you are satisfied with your changes click on Save. To cancel, click on Cancel
How to Delete a Class Time
If you would like to delete a class time you created, click on the the ![]() icon at the the end of the Class Time table for the class time you would like to delete.
icon at the the end of the Class Time table for the class time you would like to delete.
How to Perform Class Management Tasks
You may perform other managerial tasks outside of adding and deleting classes by clicking on Manage Class on the right side of the class page. This will open a drop down menu with the following options:
Some management options may not be available based on your region's policies.
Code Based Login
If enabled at the region level, 'Code Based Login' allows students to login to the Student App without their parent's login credentials. If enabled at your region level, you may generate usernames and passwords and assign them to students in your class.
To do so, click on Manage Class on the far right side of the class page. From the drop down menu, select Manage Login. This will open the Manage Student Login page. You will see a list of your class' students in a table with open form fields for Code Password and Username.
Click on Generate Code to generate login codes for all of your students. Click on Generate Password to generate passwords for all your students. Click on Export to export the data to an excel file for easy reference.
Once satisfied, click on Save on the bottom of the page to save the codes, usernames, and passwords.
Code Based Login must be enabled at the region level to be available.
Unit Plan
To learn how to edit and update your unit plan, read more.