How to Register or Invite Students
Add Students - Manual Registration
To add a new student to your class, you must first send an invitation to their parent, who then must register their child as a student of your class.
To do so, click on Manage Class on the far right of your class' page. From the drop down menu, select Register Students. This will open the Import section of the Manual Registration page.
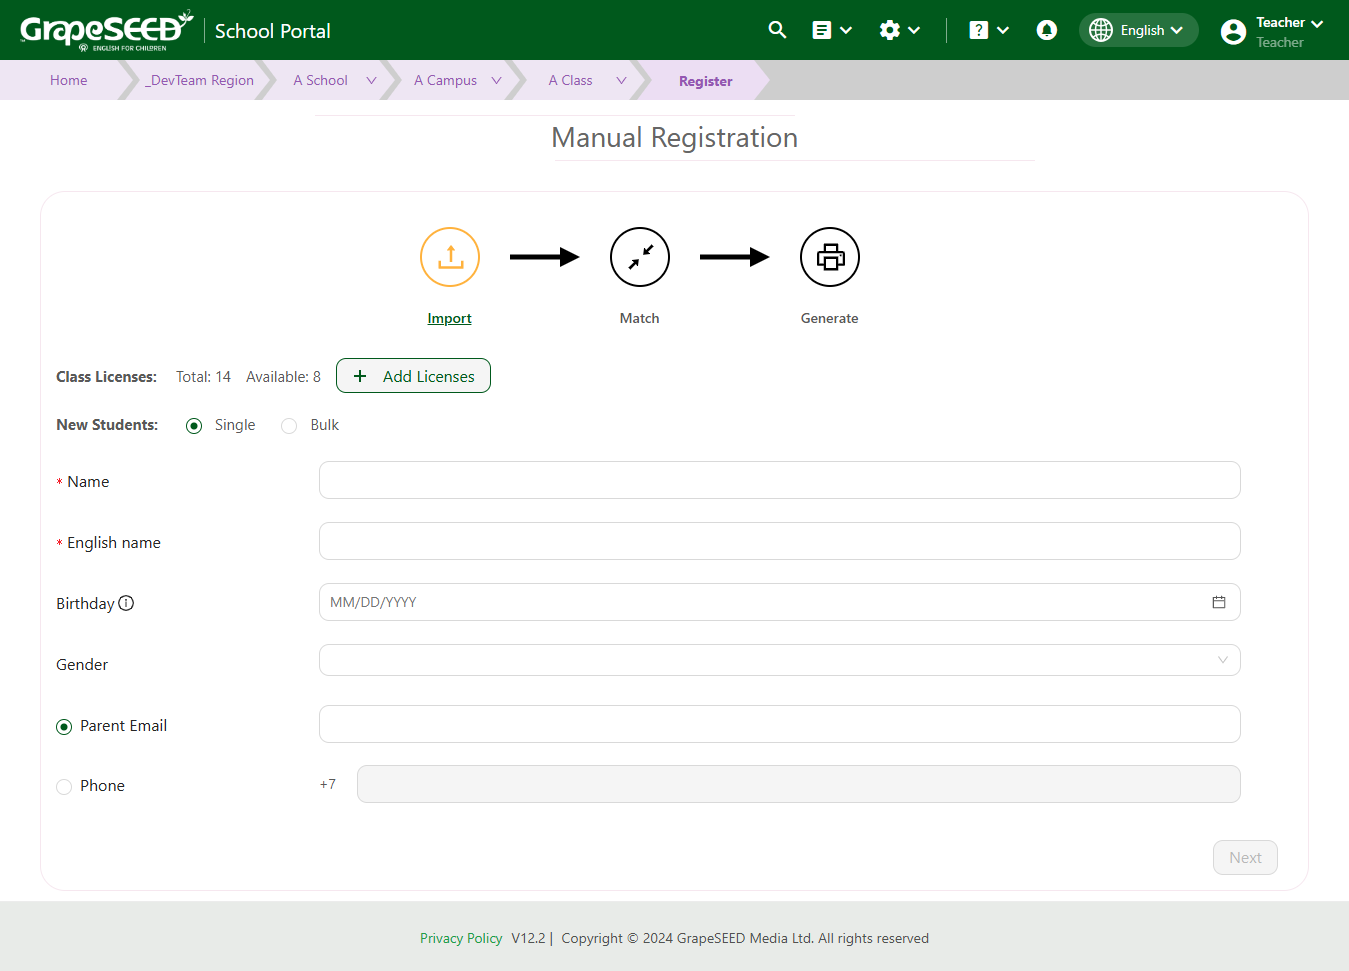
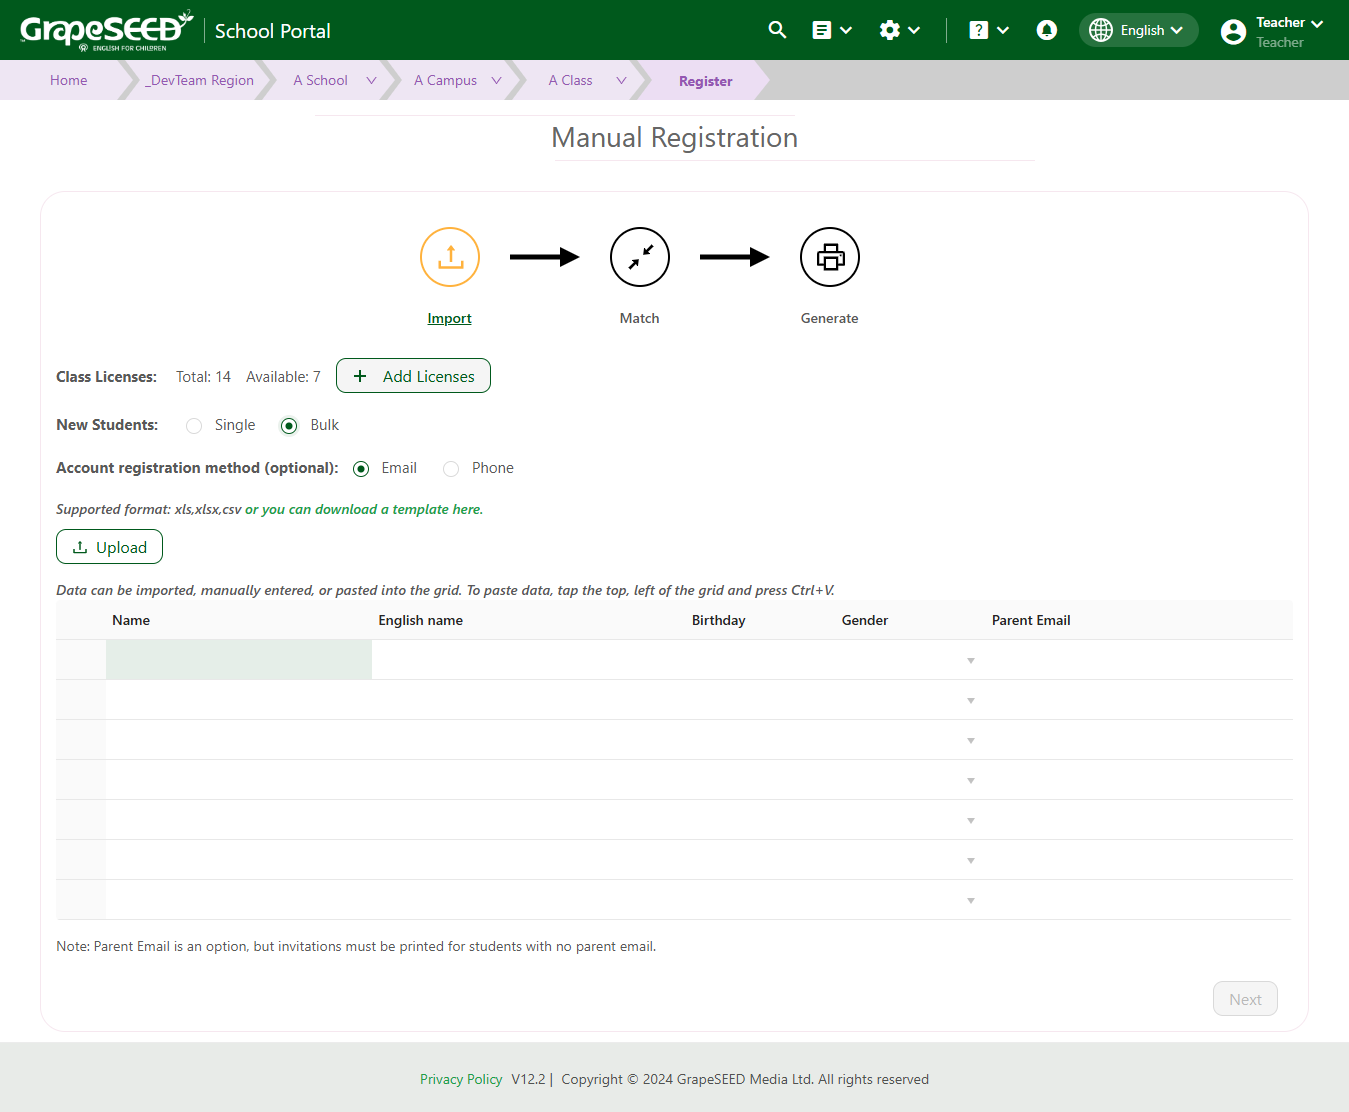
From the Manual Registration page select the option single to the right of New Students to add students one at a time. Enter the following details into the Import section
- Name
- English Name
- Birthday (optional)
- Gender (optional)
- Parent Email/Phone Number
The phone number option will only be available if the policy is enabled at the region level.
If used, the phone number must be valid and able to receive SMS messages to activate the account.
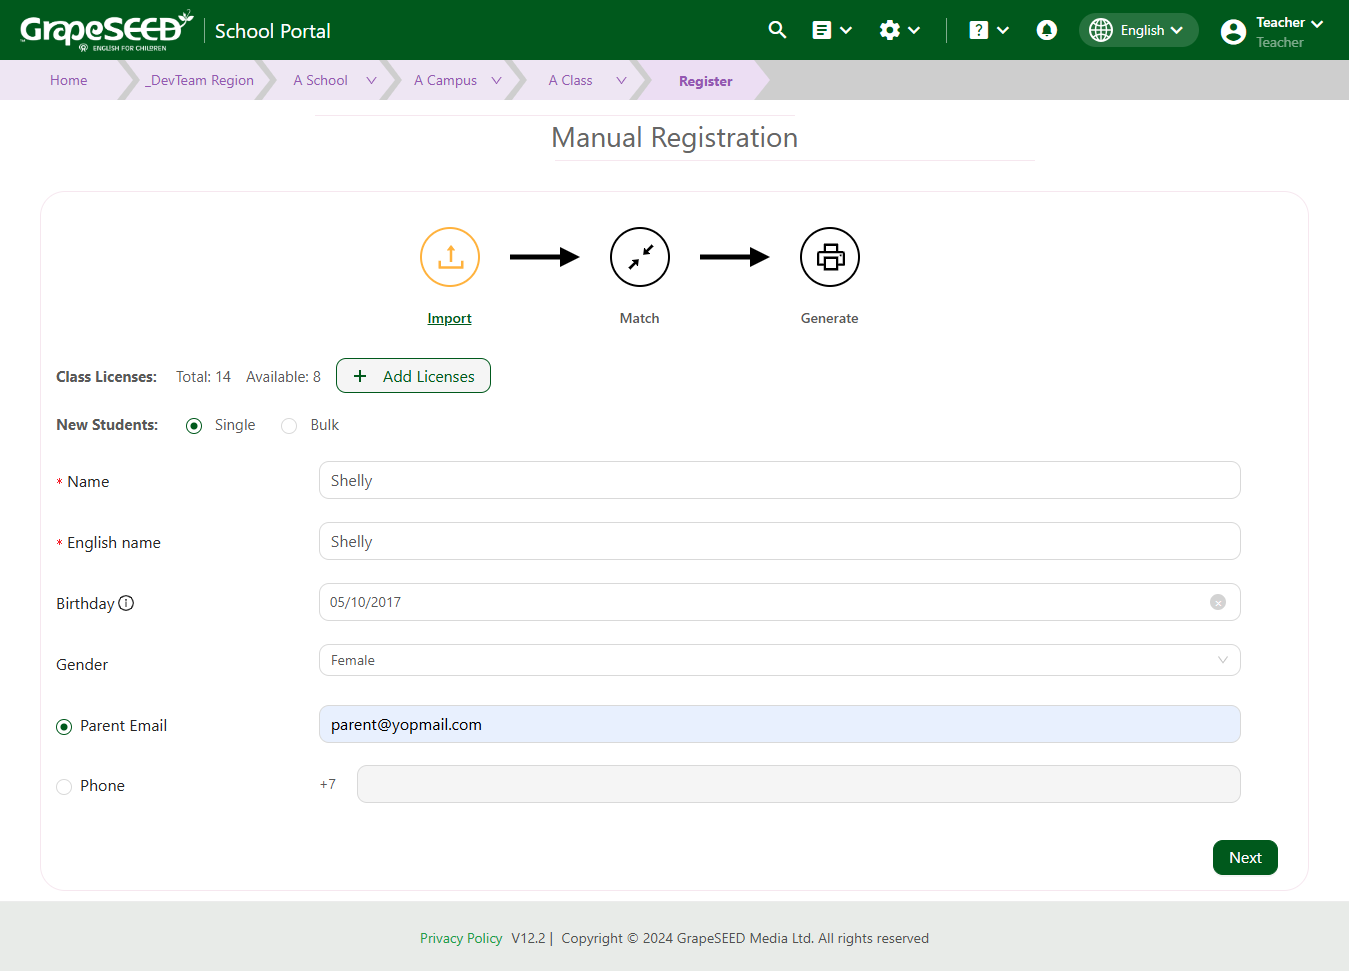
Once you enter the new student's or students' information, click on Next.
Based on the data entered, you will be redirected to either the New, Exact Matches or Potential Matches tab directly. However, you are free to go back to other tabs even if it’s empty by clicking on the Previous or Next buttons.
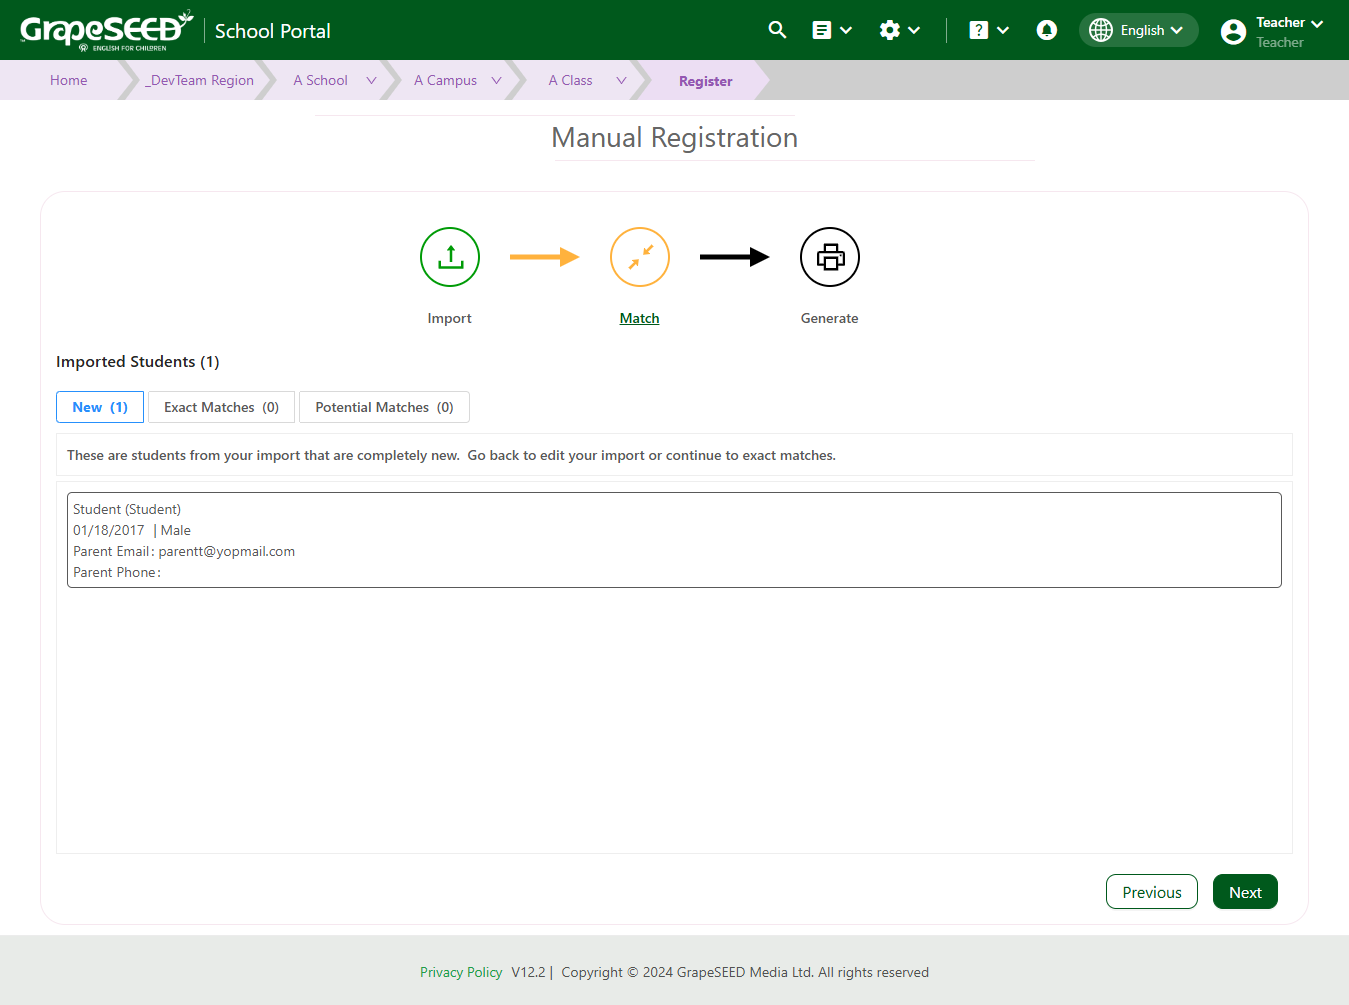
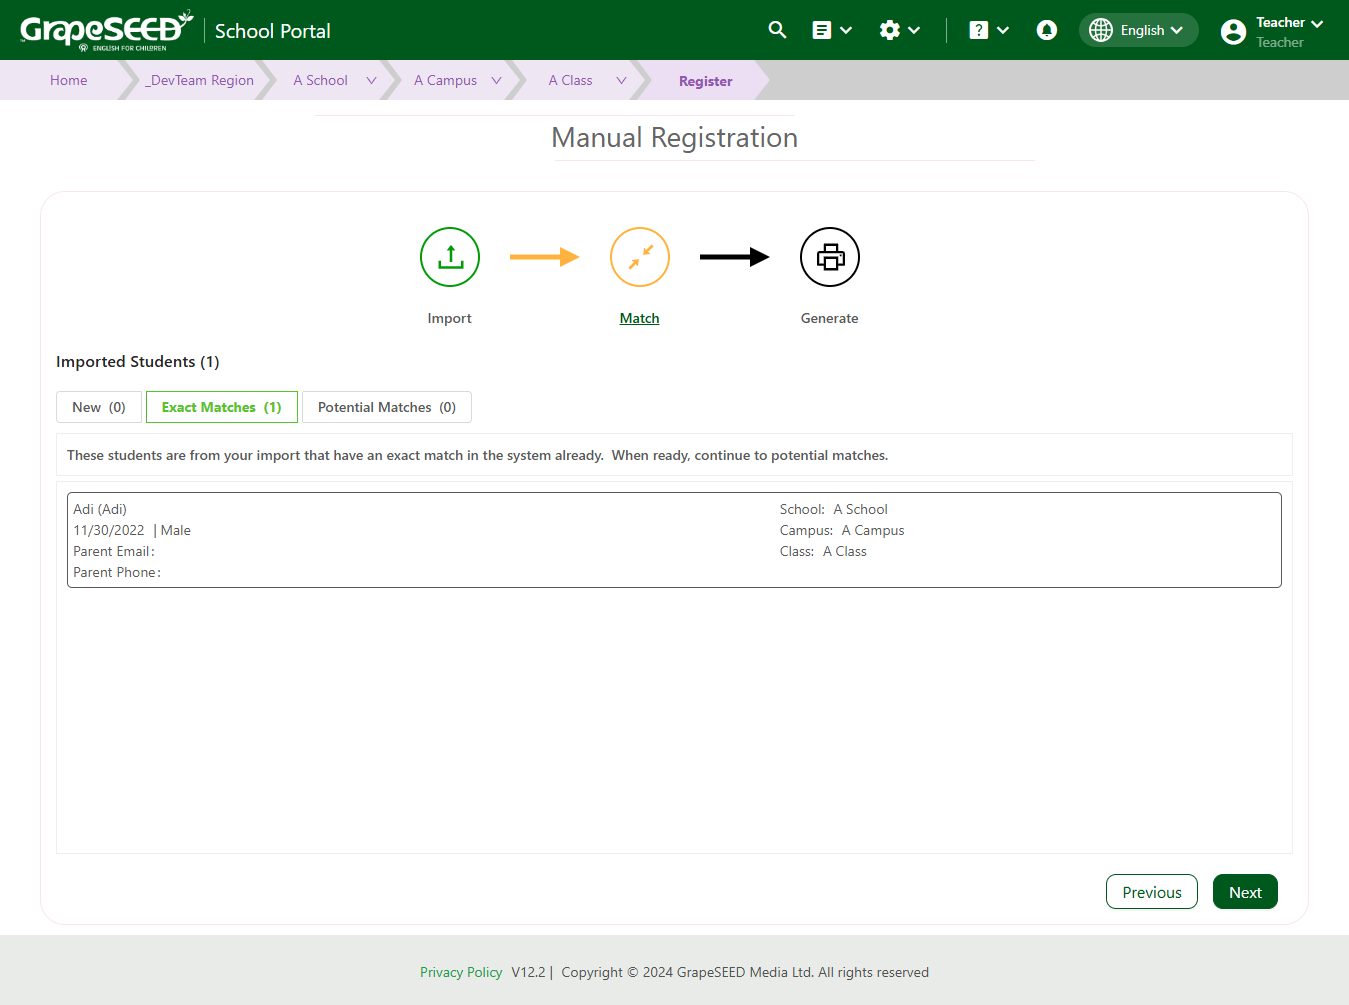
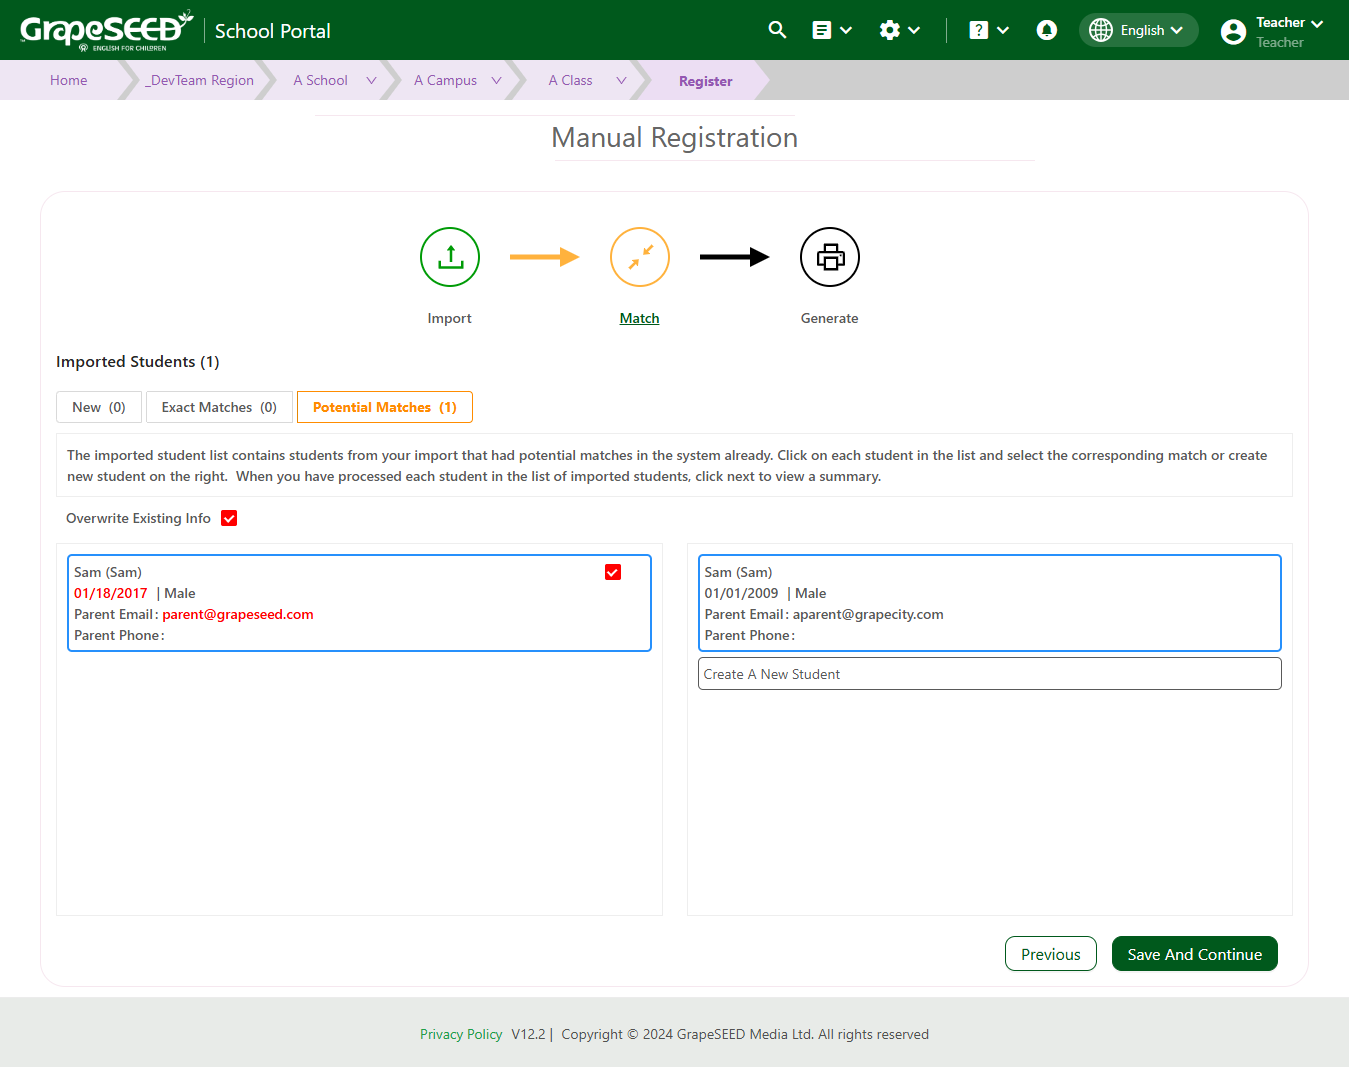
If assigned to new, your student's info was not found in the system and is unique. If assigned to exact matches your students info matches the info of a previously registered student. If assigned to potential matches your students info may somewhat match a previously registered student. You may select from these results the correct option for students you wish to update and students you wish to add.
Once you have determined the right designation for your new student, click on Next and Save and Continue. This will take you to the Generate section of Manual Registration
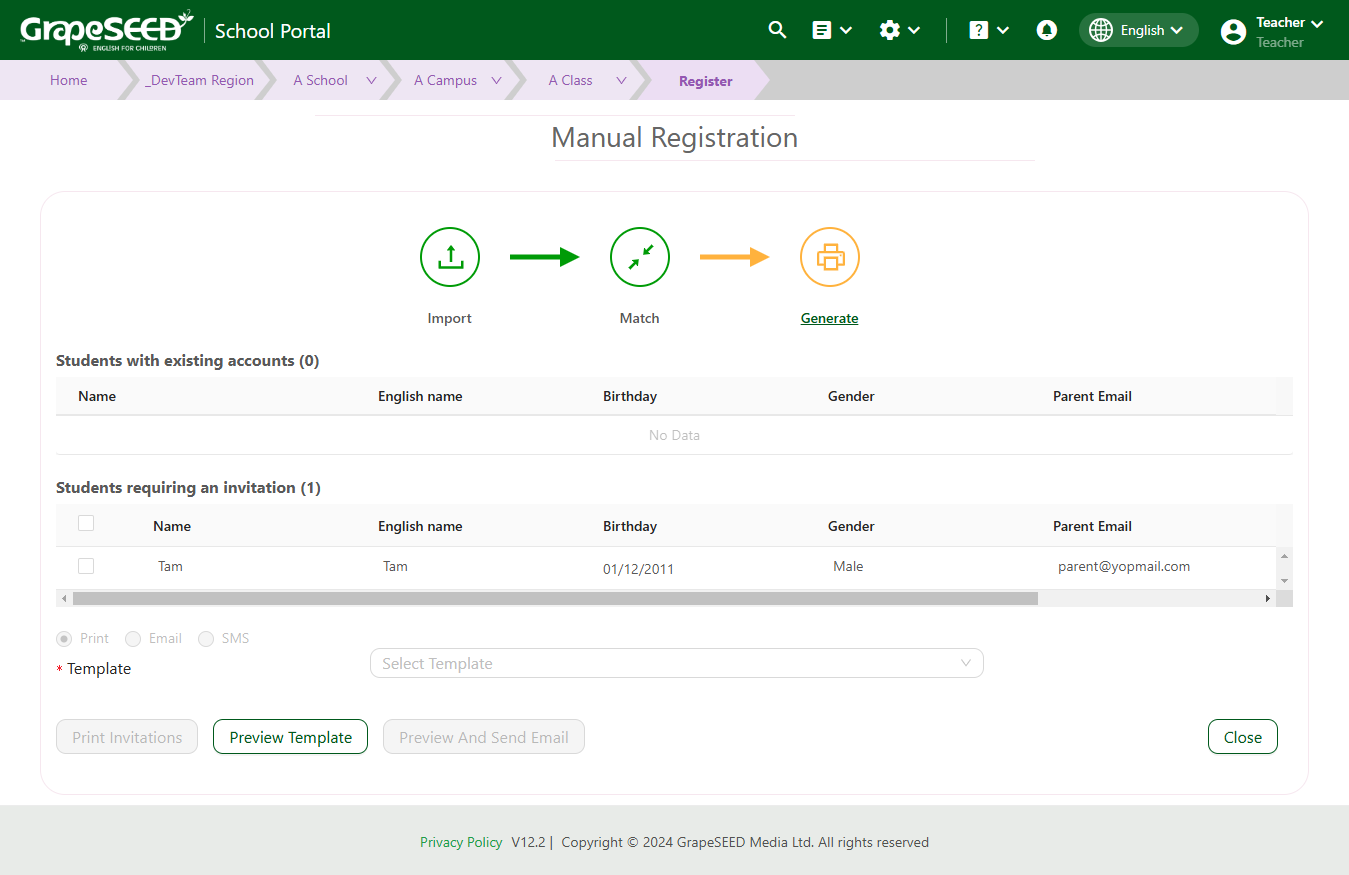
In the Generate section any students with existing accounts similar to your new students that you missed will be listed below Students with Existing Accounts. You will see your students info below Students requiring an invitation.
Depending on your region's policies, you may select Print, Email or SMS as delivery options for your registration invitation. We recommend you use the same delivery method for the parent that you entered in the Import section.
Click on the drop down menu to the right of Template to select your region's invitation template.
Once you are satisfied, click on Preview and Send Email if sending by email. If sending by print, click on Print Invitations. If sending by SMS, click Preview and Send SMS. This will send the registration information to the parent.
How to Add Students - Bulk
You may add more than one student at a time by selecting on Bulk to the right of New Students on the Manual Registration page.
Click on Upload to upload an excel file of your students information, or you may manually enter the information.
Invite Parents to register their child(ren)
To add a new student to your class, you must first send an invitation to their parent. Once the parent receives this invitation, they may register their child as a student of your class.
To send an invitation, click the 'generate invitations' button next to the student count. A new Generate Parent Invitation box will appear. Enter the following information.
- Count - Number of invitations to be generated
- Template - The invitation template to be used
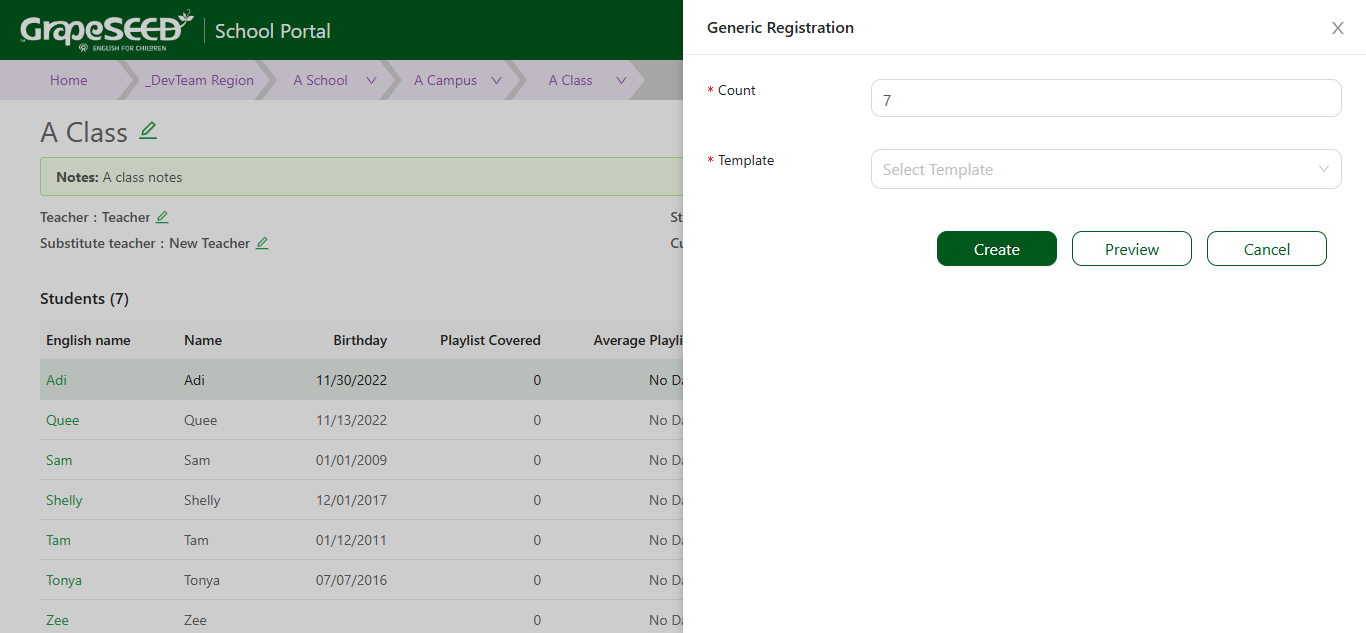
To generate the invitation, click Create. This will generate a pdf that contains the number of invitations specified in Count, usually one per page, based on the template used.
- We recommend you print the PDF and mail the invitation(s) to the parents (one per student) .
- Parents must register students before they will be added to your class.
How To Lookup an Invitation Code
Clicking the Invitation History link under the 'Manage Class' option opens the 'Portal Invitation' form.
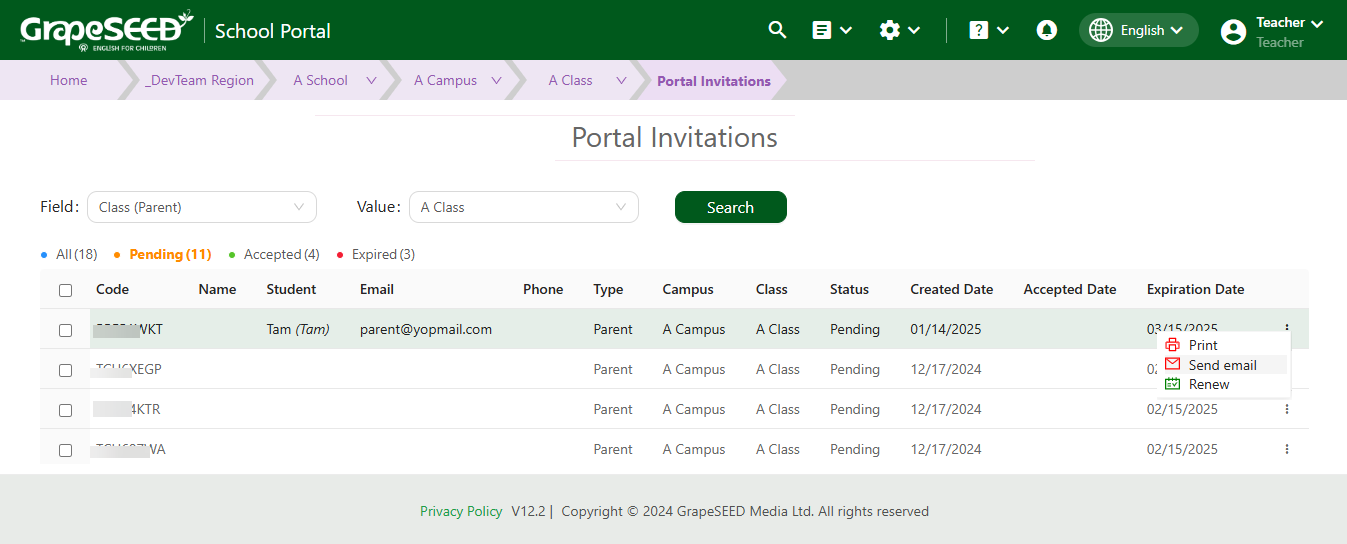
Enter the search criteria and click Search. A successful search displays the following information:
- Code
- Name
- Student
- Phone
- Type (Invitation type)
- Campus
- Class
- Status
- Created Date
- Accepted Date
- Expiration Date
- Send Email
- Renew
If a code does not exist or the user does not have permission to view the code, an error message is displayed.
Code Based Login
Depending on your region, parents may have the option to enable 'Code Based Login' for your students. This allows registered students to access the GrapeSEED Student App without their parents login credentials using codes and passwords teachers generate.
This is a policy enabled by region and may not be available, so check with your School Administrator if you're unsure.
How to Generate Codes & Passwords
To generate codes and passwords for your students, go to your class' page and click on 'Manage Class'. At the bottom of the drop down menu, select 'Manage Login'. This will open the 'Manage Student Login' page.
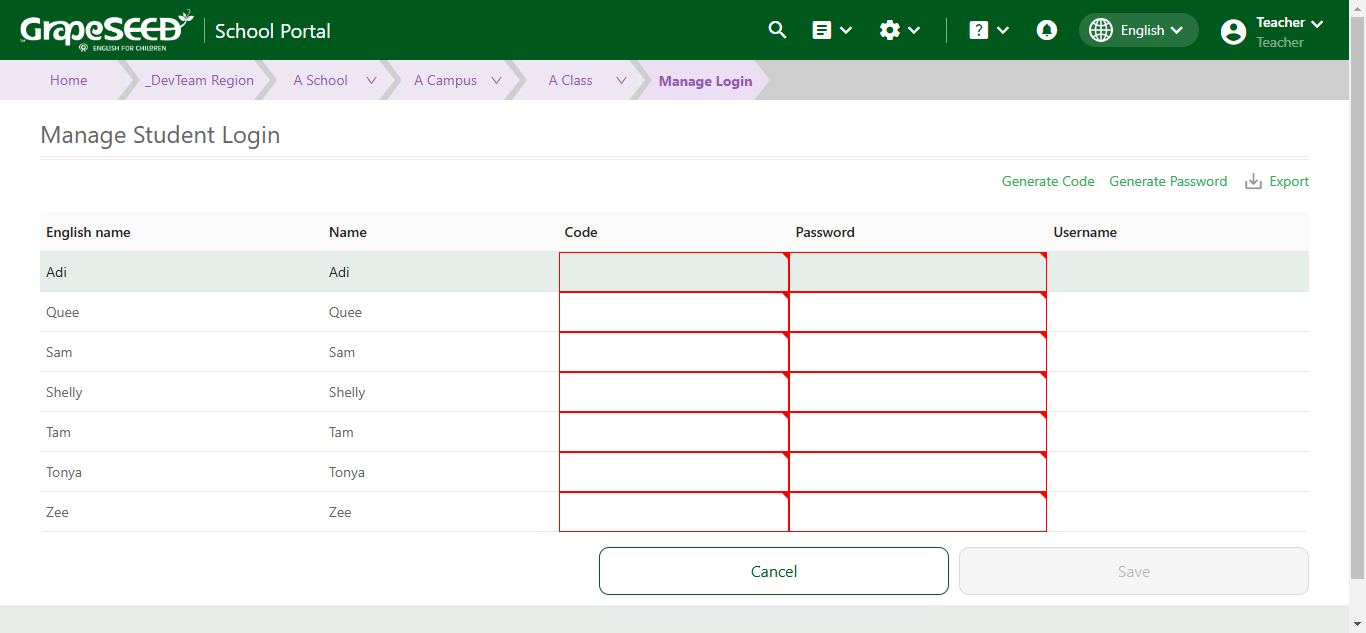
The 'Manage Student Login' page displays a list of your students' names alongside rows for codes, passwords, and usernames. To generate codes for your student list, click on 'Generate Code'. To generate passwords for your student list, click on 'Generate Password'.
When you are satisfied with the codes and passwords generated, click on 'Save'. To cancel, click on 'Cancel'.
To export the list, click on 'Export'.
Once generated and saved, you must provide the codes and passwords to your students and ensure they receive the correct ones to ensure access.
