How to Create and Manage a Campus
To access and view information about your campus, select your campus from the drop down menu. This will open the campus section of the Schools.GrapeSEED website listed above.
The Campus section of the school portal allows you to perform specific administrative actions, like viewing and managing campus and class information. This information includes:
- Campus Administrator
- List of campus classes - You may filter classes by status to show 'All', 'Active' (enabled), 'Inactive' (disabled), or 'Promotion' (promoted) classes.
- Campus menu - Select one of the following from the Campus menu drop-down list:
- Shopping cart (To order materials for the campus)
- Order history
- Add Class
- Promote Class
- Bulk Class Editor
- Change History
How to Add A Campus
To add a new campus to your school, you must select your school from the drop down menu to open your School's page. Click on Manage School to the right of your school's name and select New Campus to open the 'New Campus' form. Enter the following information into the form:
- Campus name
- Campus phone number
- Campus address
- Campus GrapeSEED Number
- Fax Number
- Nexus License
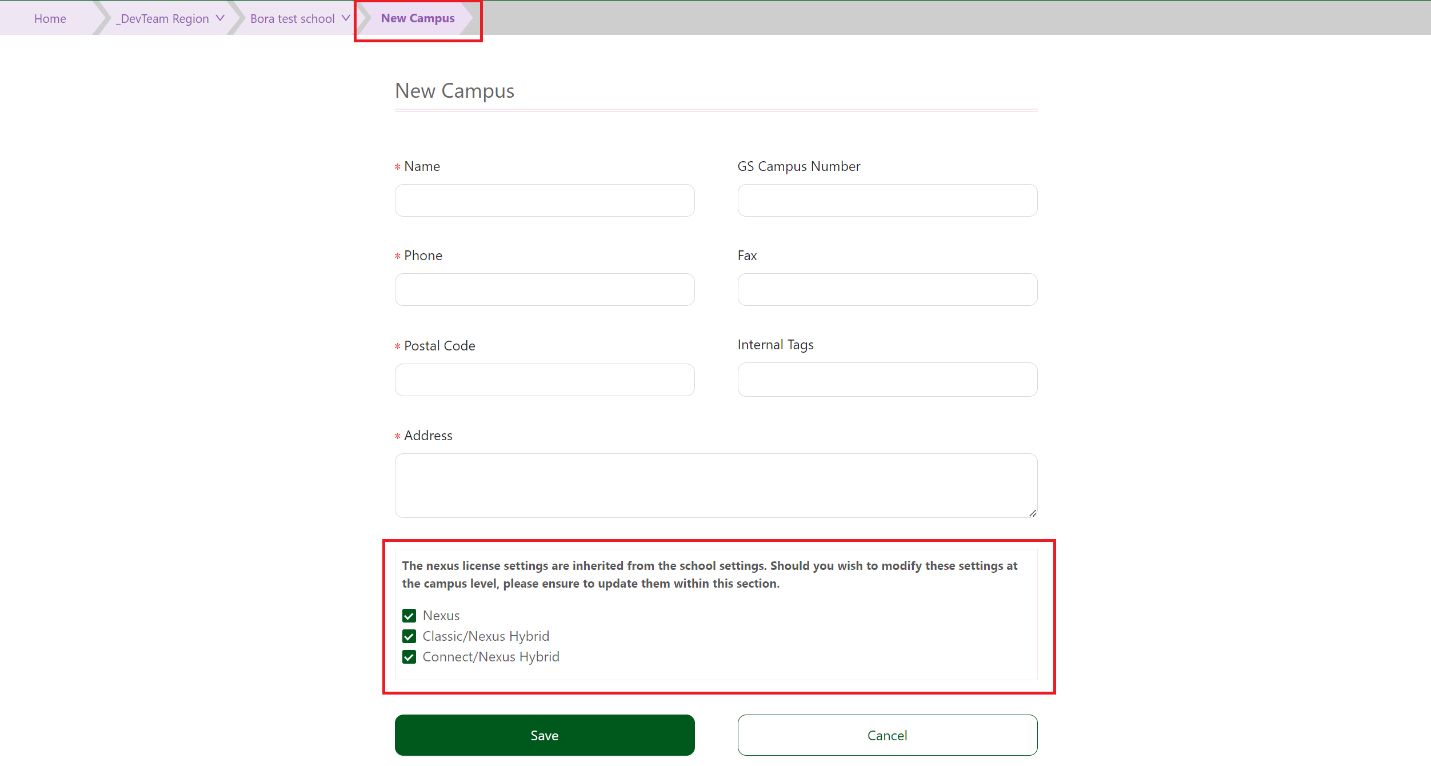
Once you complete the 'New Campus' form, select Save to add your new campus.
Only Region and Account Managers can define License at Campus Level. School Admins and Campus Admins do not have access rights to change the License Settings at Campus Level.
How to Vew and Manage Campus Details
You can view or edit campus details by clicking the ![]() button to the right of the campus drop-down list. These details include:
button to the right of the campus drop-down list. These details include:
- Campus name
- Campus address
- Contact information (phone/fax)
- Nexus License
- Enable/Disable campus
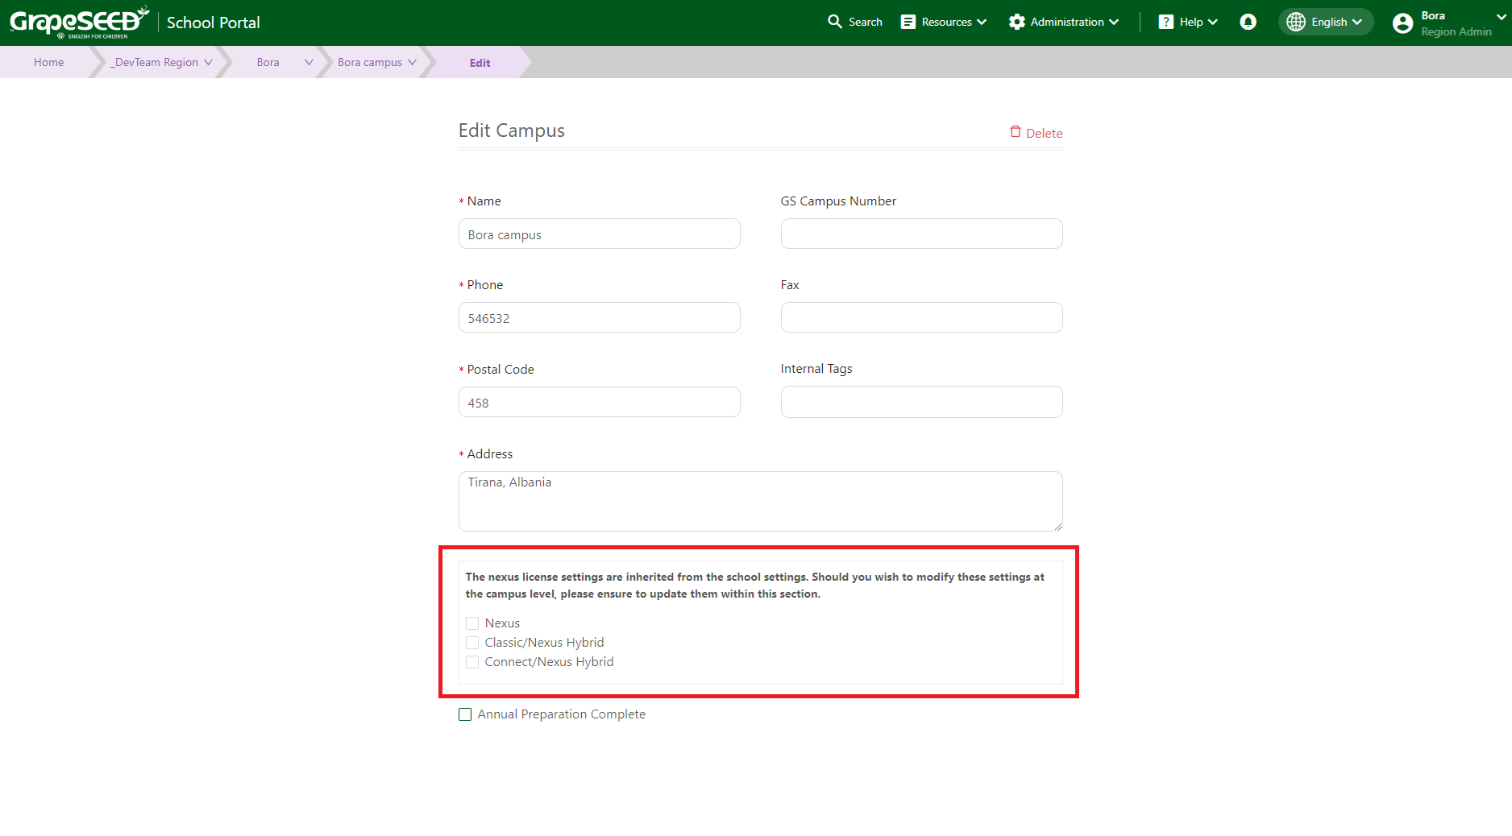
Once you're finished making your edits, click the Save button to save your changes.
Only Region and Account Managers can define License at Campus Level. School Admins and Campus Admins do not have access rights to change the License Settings at Campus Level.
How to Disable or Delete your Campus
You may disable a campus by checking the Disabled check box at the bottom of the 'Edit Campus' form. Click the Save button to save your changes.
Only a user with a School Admin or higher role can only disable/enable a campus.
Once you disable a campus, the following will occur:
- All the campus' classes will be disabled.
- No new classes can be added to the campus.
- No new materials can be ordered for the campus.
A warning message will appears if the campus has pending material requests or classes.
When re-enabling a disabled campus (by un-checking the Disabled check box), the campus' classes continue to be disabled. You must manually enable each class.
You may delete a campus from your school by opening the 'Edit Campus' form and clicking the red Delete button at the top-right corner. Press OK to confirm. This will return you to the school portal level. A campus may be deleted if it has:
- No classes
- No past material orders
- No items in the shopping cart