How to Use the Lesson Plan
Carefully designed lesson plans have been provided by the Curriculum team specifically for remote teaching. These are not identical to the in-class lesson plans. GrapeSEED Connect has these lesson plans integrated into the system for ease of use and efficiency when teaching.
To open the lesson plan view of GrapeSEED Connect, click on the red sidebar on the left side of the GrapeSEED Connect screen. This will expand the Lesson Plan sidebar and begin displaying GrapeSEED content for the student.
- How to Change Unit/Lesson Number Within an Active Session
- How to Navigate the Lesson Plan
- How to View Teaching Instructions
- How to Use Target Match
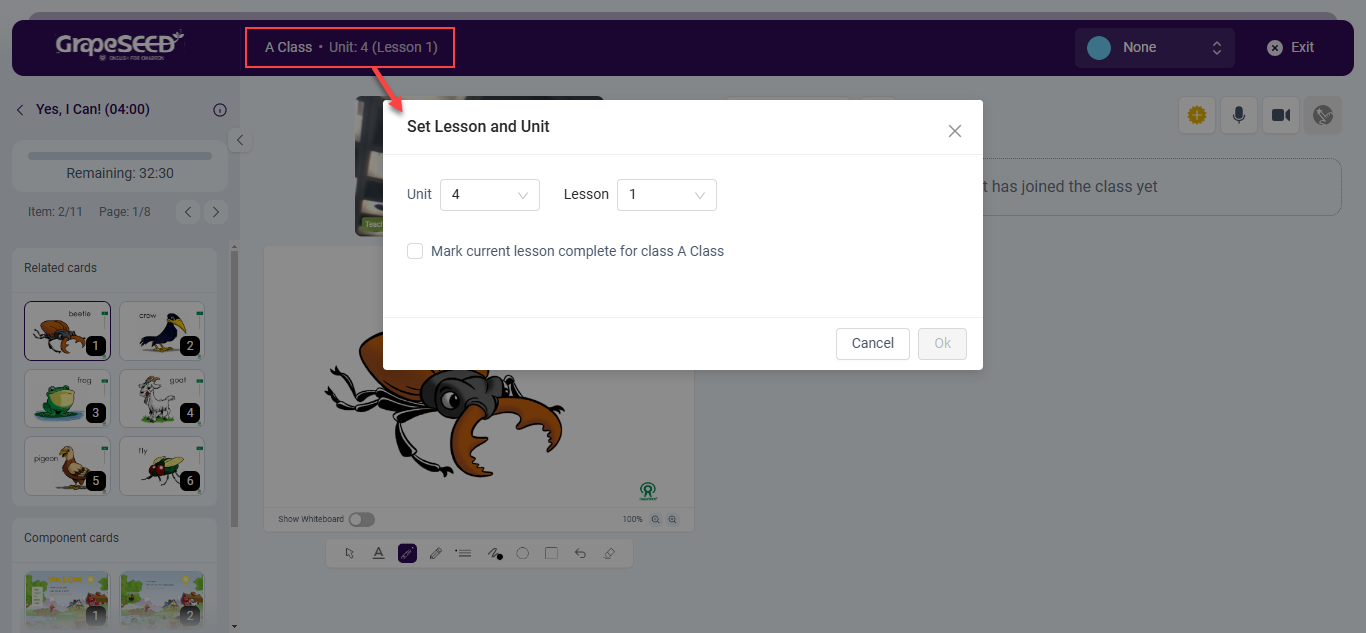
How to Change Unit/Lesson Number Within an Active Session
Once you have started an session of GrapeSEED Connect, you can still change the Unit or lesson number that you are teaching. To do so, click on the Unit: ## (Lesson: ##) at the top of the screen. When you do you will see a popup with dropdown selections for unit and lesson number as well as a checkbox to mark the current session as complete.
When you select a new Unit and Lesson Number, you can click the OK button to change to that Unit/Lesson. If you have also checked the checkbox to mark the lesson complete, the lesson you are switching from will be marked as complete and the unit plan lesson number will be incremented.
How to Navigate the Lesson Plan
Once you have opened the lesson plan, there are several ways to navigate it.
You can use your mouse to click specifically on each item you want to display to the students.
- To move to the next image in the same component, simply click on the image you want to display.
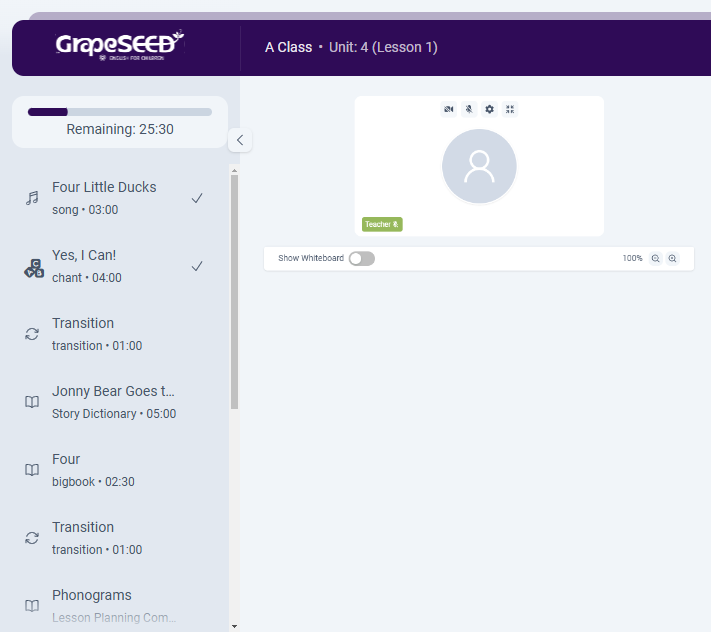
- To change to a different component in the lesson plan, click the left-pointing back arrow to view the entire lesson plan and then click on the component you want to use.
To move sequentially (one after the other) back or forward, image by image, component by component, you can use the arrow keys on your keyboard:
- Left arrow key will go backwards in the lesson plan
- Right arrow key will go forward.
- When you get to the end of one component, you will automatically move into the next component with the arrow key, no need for mouse navigation.
Note: Keyboard navigation does not allow the teacher to see all the components all at once. To do this, click the left facing back arrow above the component panel in the lesson plan sidebar to exit the current component and enter the full lesson plan view.
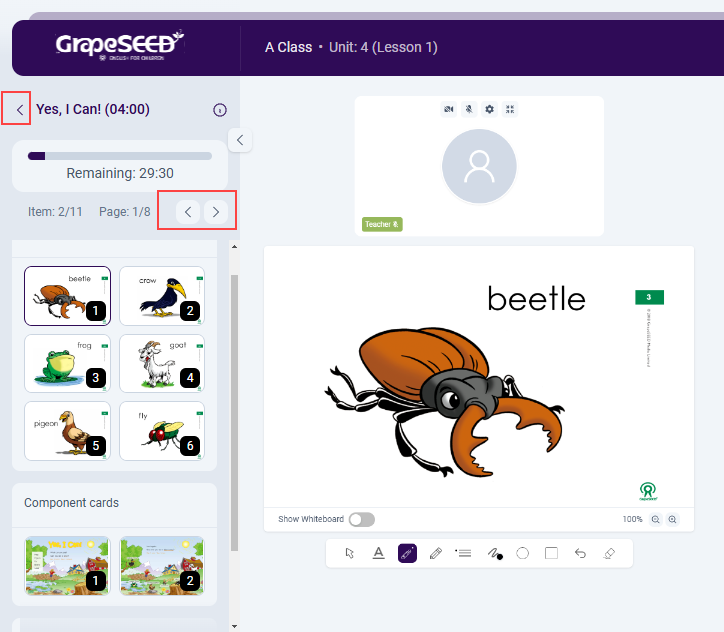
To move sequentially only forward in the component, use the right arrow below the Time Remaining counter in the lesson plan sidebar.This button allows you to move one at a time to the next image.
How to View Teaching Instructions
When the curriculum team created lesson plans, they included teaching instructions. These can be viewed either all at once, or one at a time if they were associated with specific images.
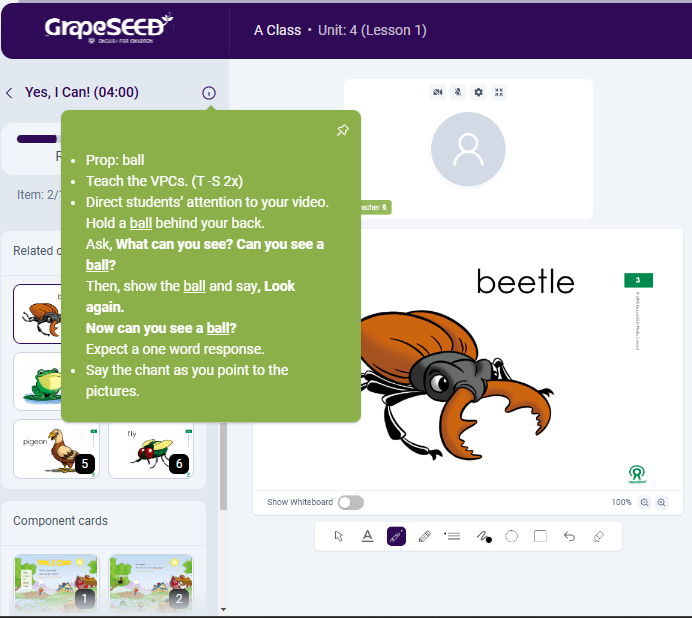
To view them all at once, simply hover over the ![]() in the component panel. All the teaching instructions will be displayed, in order, for that component. If you click on the pushpin icon in the top right over the hovered-over instructions, they will open within a movable, resizable box that can be closed at any time using the "X" at the top right of the teaching instructions box.
in the component panel. All the teaching instructions will be displayed, in order, for that component. If you click on the pushpin icon in the top right over the hovered-over instructions, they will open within a movable, resizable box that can be closed at any time using the "X" at the top right of the teaching instructions box.
To view specific instructions for images, hover over the individual images in the teaching activity section of the component panel.
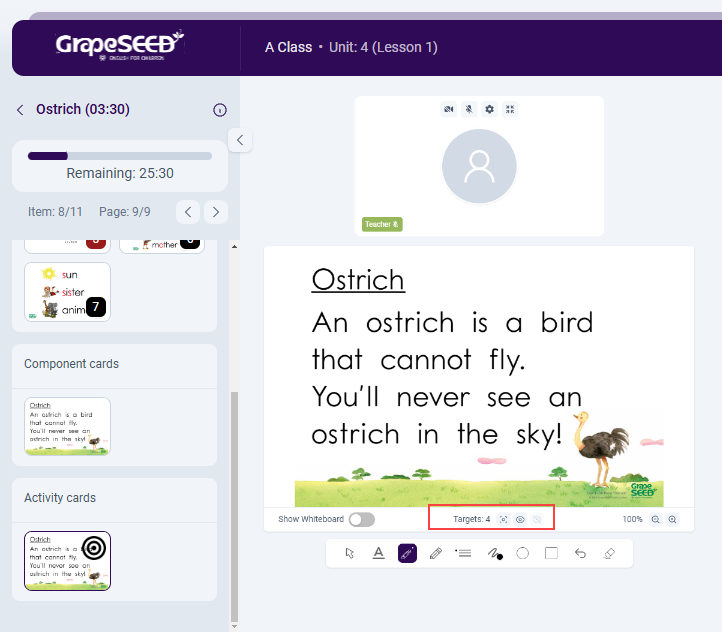
How to Use Target Match
If the curriculum team has included target match for the component and lesson you are teaching, the instructions will be linked to the image that has targets. To select a target as the teacher, you simply need to click on the image where the target is and after you have clicked on the correct spot, the target will appear. Alternatively, you can show all targets at once by clicking on the Show all targets button. To hide a target, you can click on it or you can hide all targets with the Hide all targets button.
In the case you wish to view all targets without revealing them to students, you can use the Preview button. This button will open a popup with the component image and revealed targets. This preview image is visible only for you, the teacher, and can be closed at any time with the ![]() button in the top right corner of the popup.
button in the top right corner of the popup.
You may also have students select targets. To do that, you must enable interaction for the student. You can do this by using the ![]() individual student management button, as you hover over their video feed.
individual student management button, as you hover over their video feed.
Note: The student will not be able to do anything if the component image you are currently on has no targets.
As you teach, note that there is a count of the total number of targets for the image you are on at the bottom left of the component image, just below the viewing window.