GrapeSEED Connect Annotation
How to Use Annotation
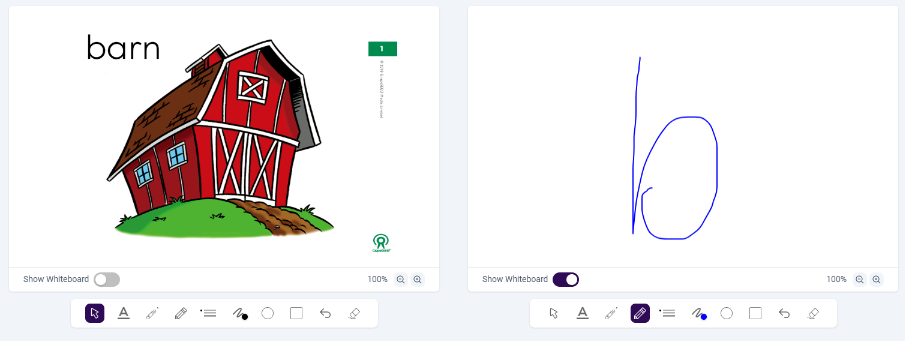
Annotation Palette
GrapeSEED Connect provides an annotation palette for teachers to mark on the component images and whiteboard. This palette does not create permanent marks but allows the teacher to digitally point or select parts of the materials and even to type words onto the screen.
There are 10 tools in the annotation palette:
Utility tools
- The
 is the default tool and it allows the teacher’s cursor to be visible to students when the cursor is on the component image or whiteboard.
 - The
 allows the teacher to create a text box and type text visible to the student. Teacher can select preferred font option change font size.
 - The
 allows the teacher to point, underline, or otherwise draw lines that will automatically be removed in the same direction a mark is drawn. This tool is ideal for tracking text while reading or temporarily circling a part of the component image.
 - The
 functions in the same way as the laser tool except that the marks stay on the component image until erased or moving to a different component image.
 - The
 creates a circle shape on the component image/whiteboard which can then be moved resized, rotated and deleted.
 - The
 creates a square shape on the component image/whiteboard which can then be moved resized, rotated and deleted.
 - The
 removes one drawn item at a time in reverse order that they are drawn. For example, if you draw a vertical line, a horizontal line, and a curvy line, then choose to use the , it would remove the curvy line first, the horizontal line second, and the vertical line last.
 - The
 removes all drawings on the current component image/whiteboard.
Tool Settings
- The
 will set the width of lines drawn after the setting is selected.
 - The
 will set the color of items drawn after the setting is selected.
Zoom For the Component Images
Though not strictly annotation, teachers do have the ability to zoom in on displayed components from the View Box itself. In the top right corner, there are two magnifying glass icons, one with a "+" and one with a "-". Underneath the icons is a label indicating the degree of current zoom. Simply click on the "+" or "-" icons to zoom in or out as desired.
How to Use the Whiteboard
The Whiteboard is a place for the teacher to draw and/or type content for the students. To open the whiteboard, simply click on the gray dropdown bar underneath the teacher video feed. When opening the whiteboard, it will replace whatever the students are currently looking at. For example, if the lesson plan is open and content is being displayed, opening the whiteboard will hide the content and the whiteboard will be displayed for students instead. To use the whiteboard, simply select the annotation tool you want to use from the annotation palette and begin annotating.