-
 jp
en
jp
en
How to use Student Interface to Learn with GS Connect
The GrapeSEED Connect student interface is thoughtfully designed to enhance the learning experience by emphasizing the most important content. The main content view box is centrally positioned on the screen, alongside the teacher's video feed, enabling students to focus on the learning material. Below the teacher's video feed, students have control options such as the audio toggle, video toggle, and the Jonny Bear raise hand button. Additionally, the student's video feed and a collection of stickers earned during the current session are prominently displayed. Depending on the device being used, a collapsible box at the bottom of the screen may contain the video feeds of classmates. All essential tools for effective learning are readily accessible on any screen or device.
Students in a GrapeSEED Connect can join a class session using three different devices.
Students can join a session using a web browser. This, if using a computer and having the browser in fullscreen, will be the largest screen a student could use, meaning more things will be visible. The content and teacher video are central and primary in view. Student video and controls are secondary, below the teacher video. The other students in the class are also clearly in view at the bottom of the screen. This class video panel is collapsible but open by default.
Students could use the mobile app on a tablet. This would be the second largest screen that a student could use. This view will have minor differences compared to the web browser view. The class video panel at the bottom of the screen is closed by default, which allows the content and teacher video to be larger on the screen. In addition, the general shape of the screen is a different size, but portrait and landscape are both supported.
Students could use the mobile app on a smartphone. This screen will be the smallest screen a student could use which means there are significant differences compared to the web browser view. The class video panel in this view is removed completely, students will not be able to see their classmates when using a mobile phone. Similar to the tablet view, both landscape and portrait modes are supported, so the size and shape of the screen as well as the content on the screen will vary.
In the image below, from left to right, you can see portrait and landscape views on a phone, the web browser view, and finally landscape and portrait views on a tablet.
How to use the Audio/Video controls and the Raise Hand button
- The microphone control is how you can mute or unmute yourself
- The video control is how you can hide or show your video feed
- The Raise Hand button is a way for you to draw the teacher's attention
All three of these icons function as toggles, meaning you turn them on or off with one click. To mute yourself or turn off your video, simply click the corresponding icon. To turn them back on, simply click the icon again. If you have a question, need help, or want to answer a question, you can "raise" your hand by clicking on the Jonny Bear raise hand button. To lower your hand, you can click it again.
When your child clicks on the Raise Hand button, they will see a red ring around their video feed. This indicates that their hand is raised. Once their hand is lowered, either by them or their teacher, this red ring will also go away.
Jonny Bear Instructions
When the teacher wants to give general instructions, they will use the Jonny Bear instructional icons. These are meant to convey basic instructions to students and they appear only when used by the teacher, in the header at the top of the screen. When selected by the teacher, the icon will first appear larger and slowly shrink into place in the header of the page. There are 6 general instructions that the teacher can give:
- Interact
- Listen
- Question
- Quiet
- Sing
- Speak
Stickers Functionality
Teachers can award students stickers during class. They are used as a class management and engagement tool by teachers. These stickers will appear on the screen with a chime when the teacher has awarded a student a sticker. After a moment, the sticker will disappear, but the number of stickers received will increase. This is displayed in the small sticker icon on the bottom right of the student video feed.
These stickers are not tracked or saved. For each new class session, all students will start with zero stickers.
How to use Target Match
GrapeSEED Connect offers an impactful way for students to interact with the teacher and materials to optimize learning. This is called a "Target Match". The goal is to emulate the interaction students would normally have in class.
At appropriate points in GrapeSEED lessons, students can interact with the materials, as instructed by the teacher, allowing them to identify images or words on the screen. When a student is expected to interact with the materials, the teacher will call on that student, enabling interaction, and the student can begin finding targets on the content as instructed by the teacher. If the student finds a target, the shape will appear.
One-on-One Mode
GrapeSEED Connect is a useful tool for teachers to give students one-on-one attention when needed. This mode is initiated and ended by the teacher and your child's role is simply to interact or participate as instructed.
If your child has entered one-on-one mode with their teacher, their classmate's video will be hidden, but communication with their teacher will still be available.
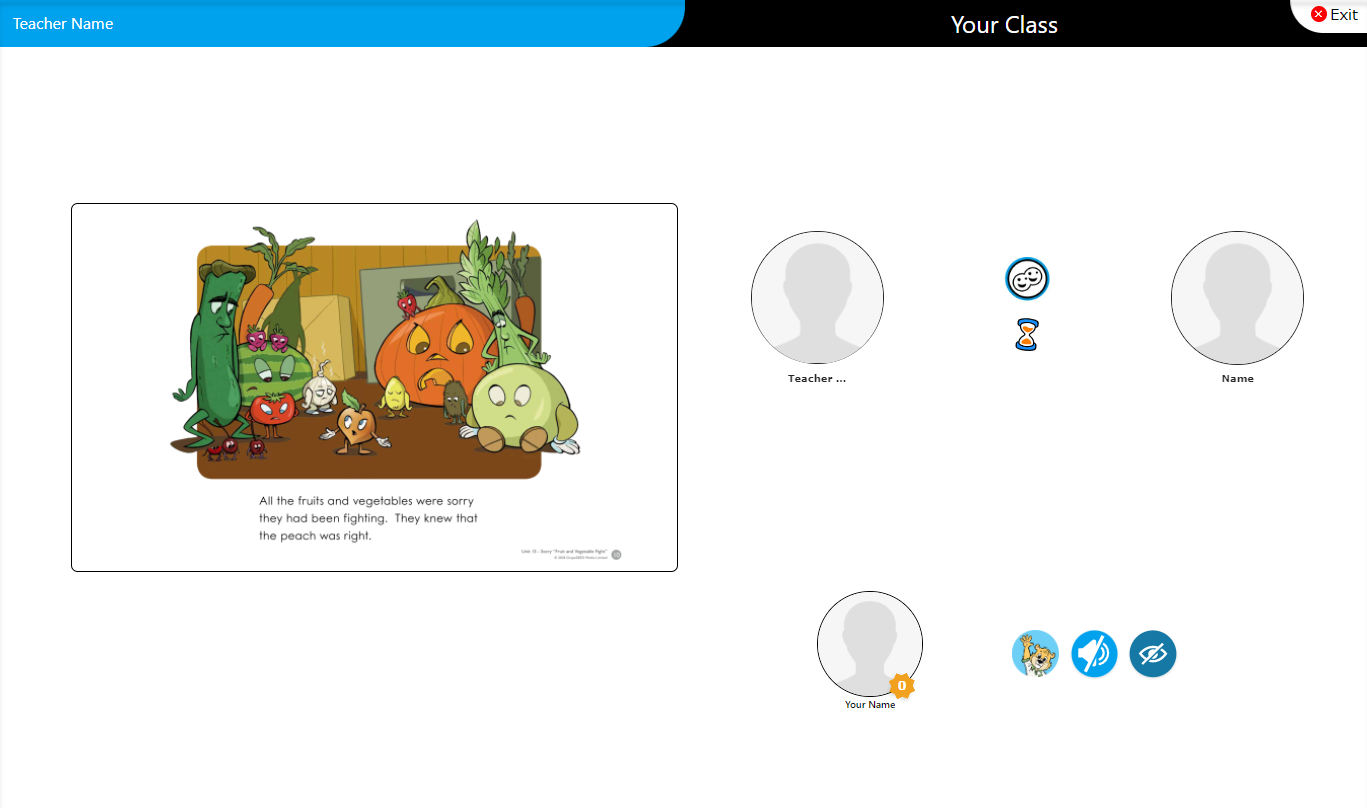
While the teacher is in one-on-one mode, the rest of the class will continue seeing whatever was being shown in the content panel, as well as an visual cue that the teacher is in one-on-one mode with one of their classmates. The other student video feeds are also hidden. If your child is not currently in one-on-one mode, their screen will look like the image below.
Independent Mode
Independent mode provides students with the opportunity to read through a component on their own like they would in person. It also allows the teacher the opportunity to observe each student and potentially provide feedback to individual students. This interaction and opportunity is one key to success in a Connect classroom.
Once the teacher starts the independent mode, students can only view the teacher, read, learn, and navigate slides. They cannot view the other students in the class.
The independent mode will end immediately when the teacher changes the unit, lesson number, or content.